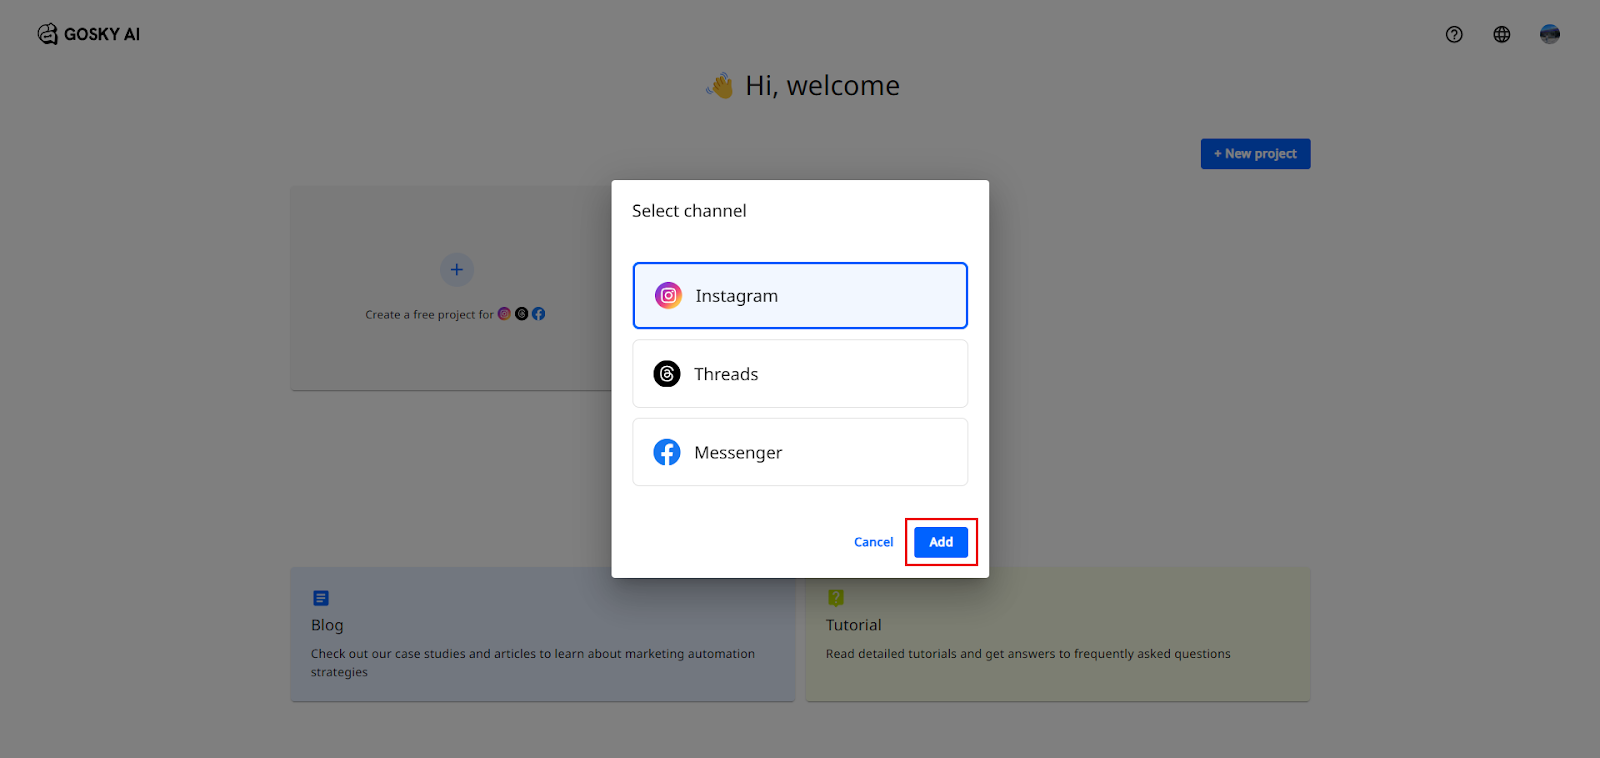
Before we start, create a new project for our Instagram

Select the channel of “Instagram” and add
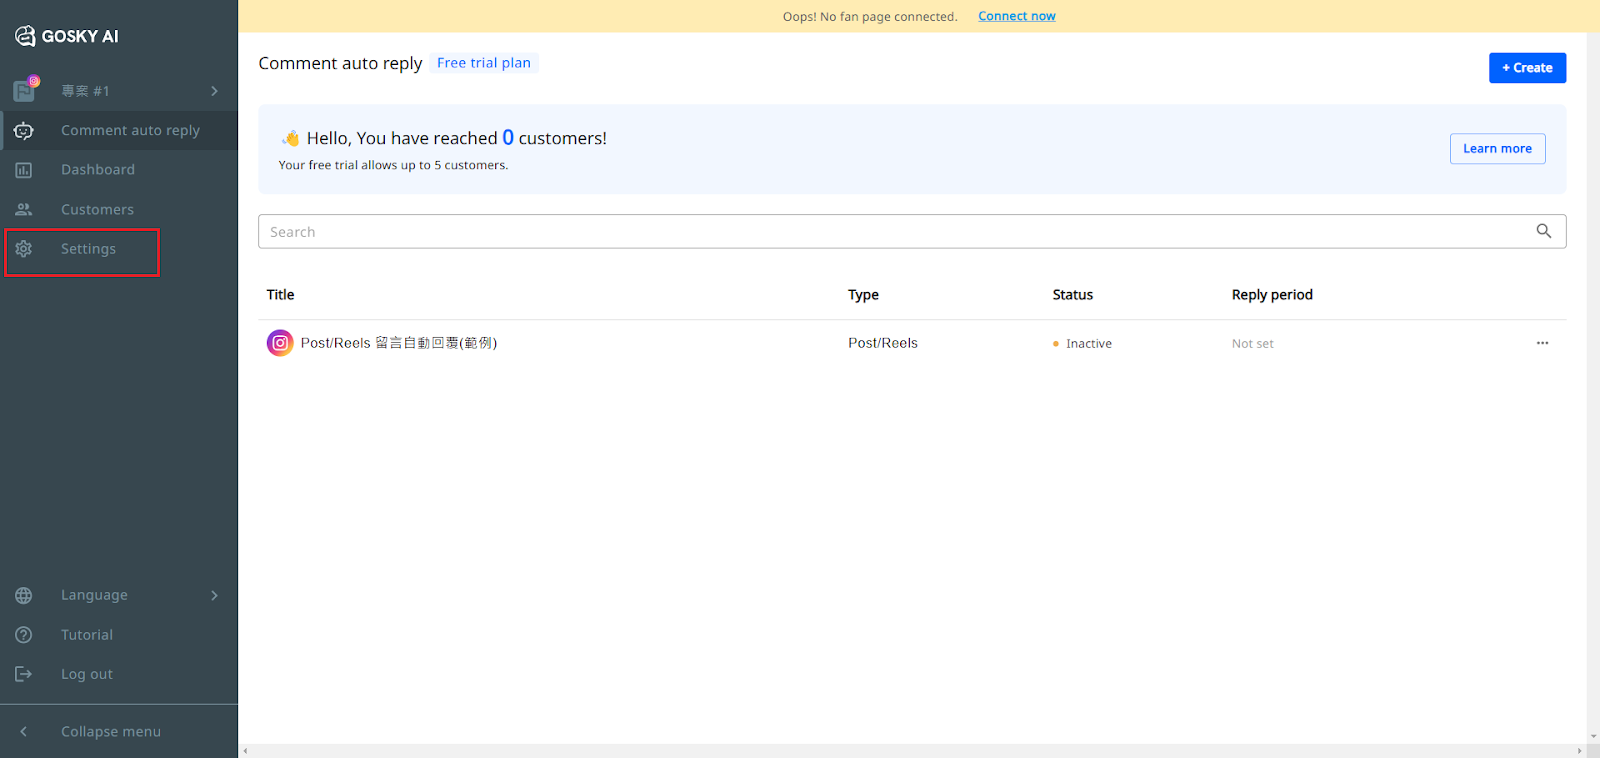
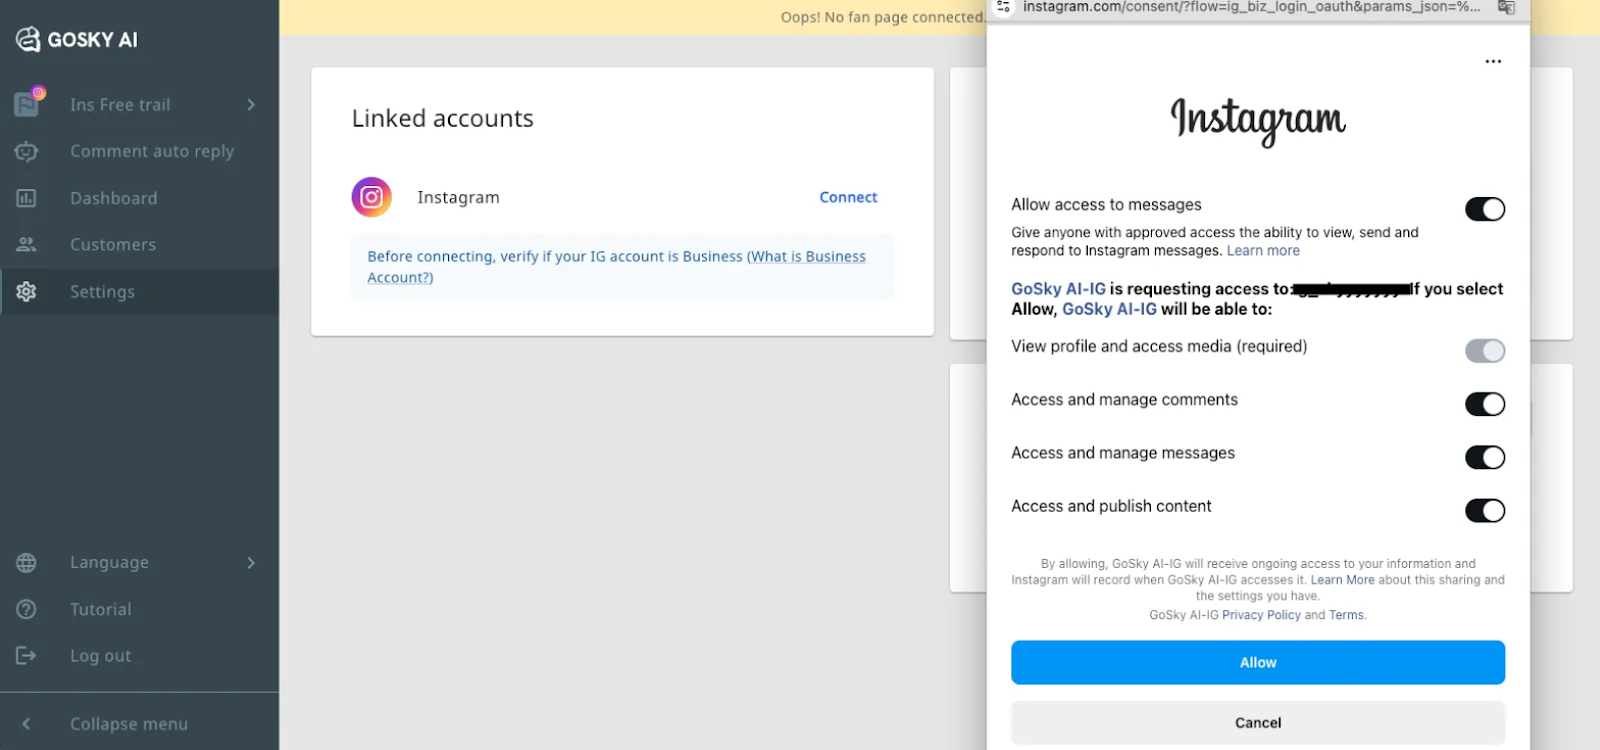
Step 1: How to connect your Instagram account
- Navigate to the Setting Feature
- Click “settings” in the left column of the Comment Auto-Reply to DM feature page.
- Press connect to link your Instagram account
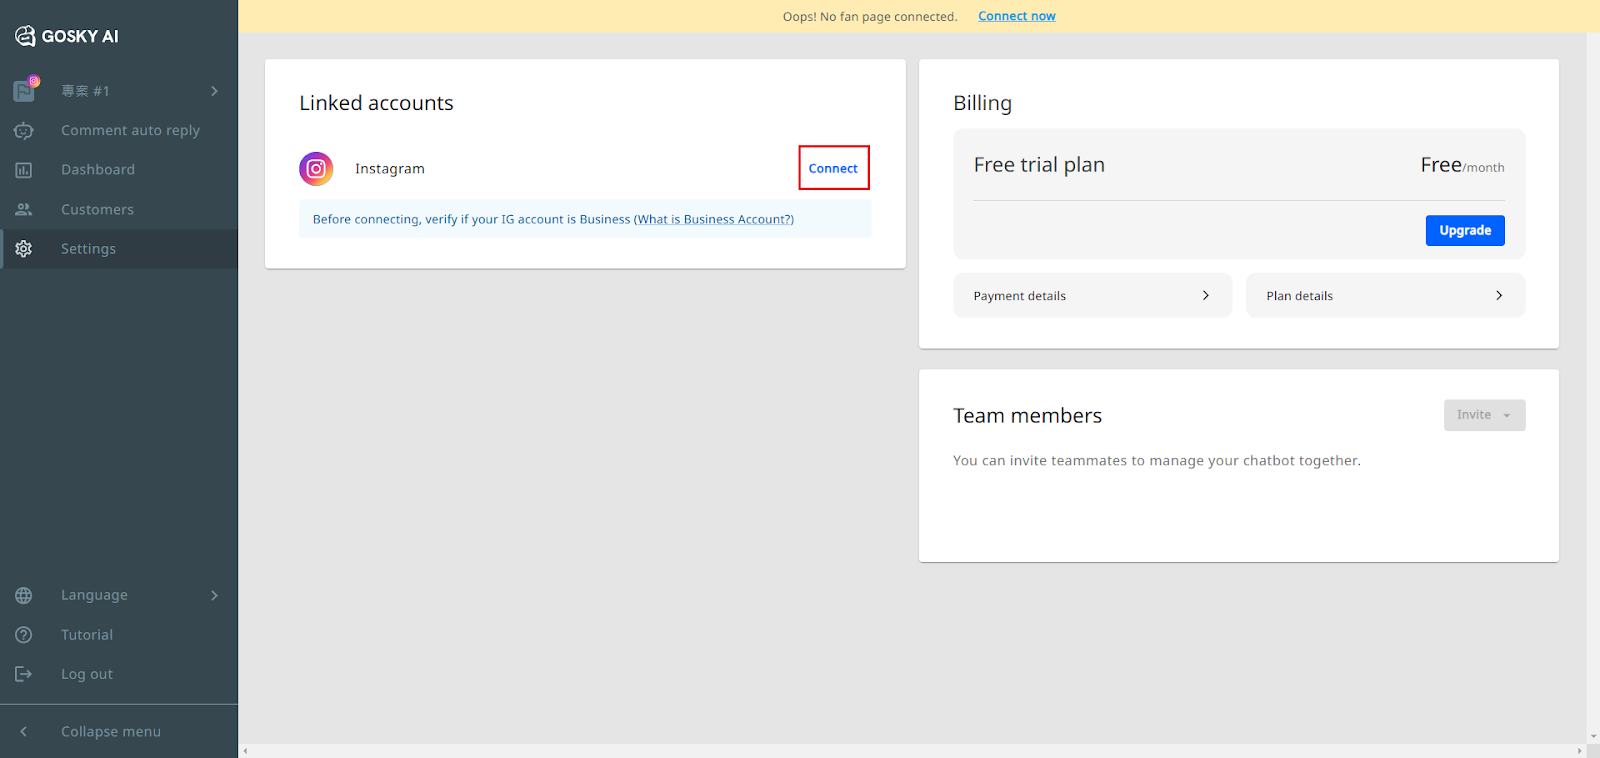
- Agree for the authorization
This authorization is completely safe, as it does not permit us to make any changes to your settings or data.
✅Rest assured, your control remains entirely in your hands.
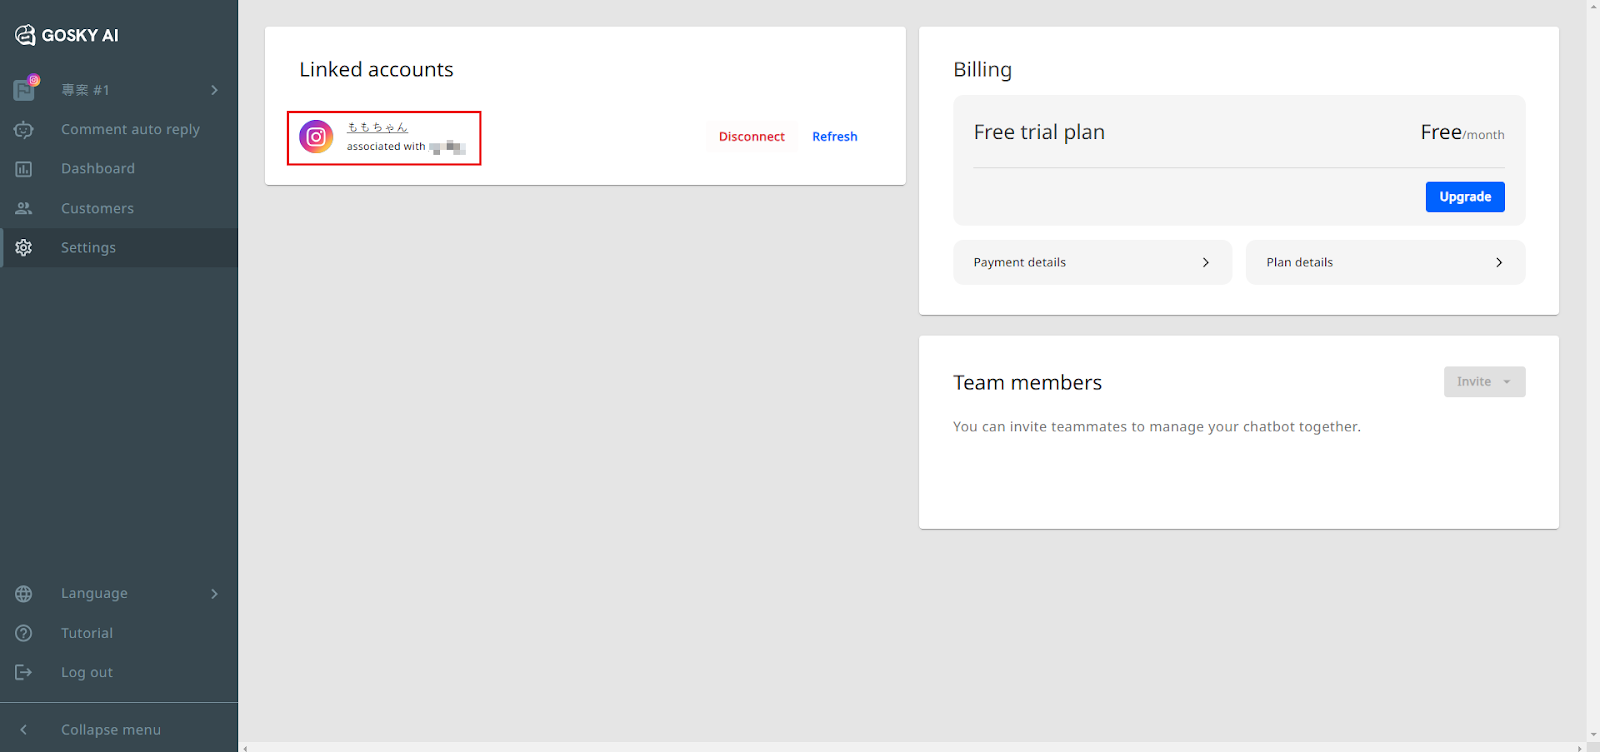
- Once you complete the connection, you will see your linked account below
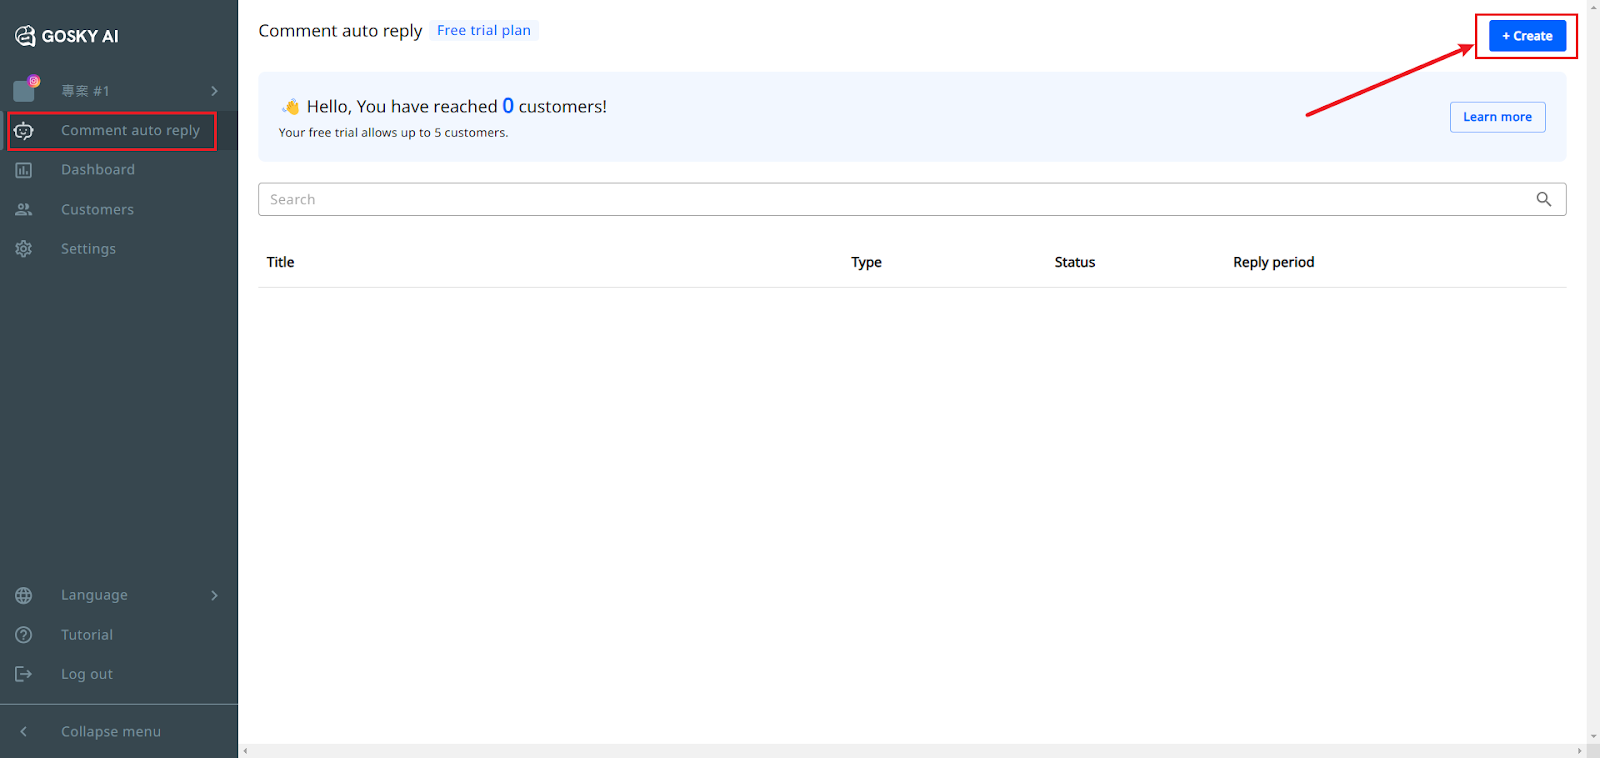
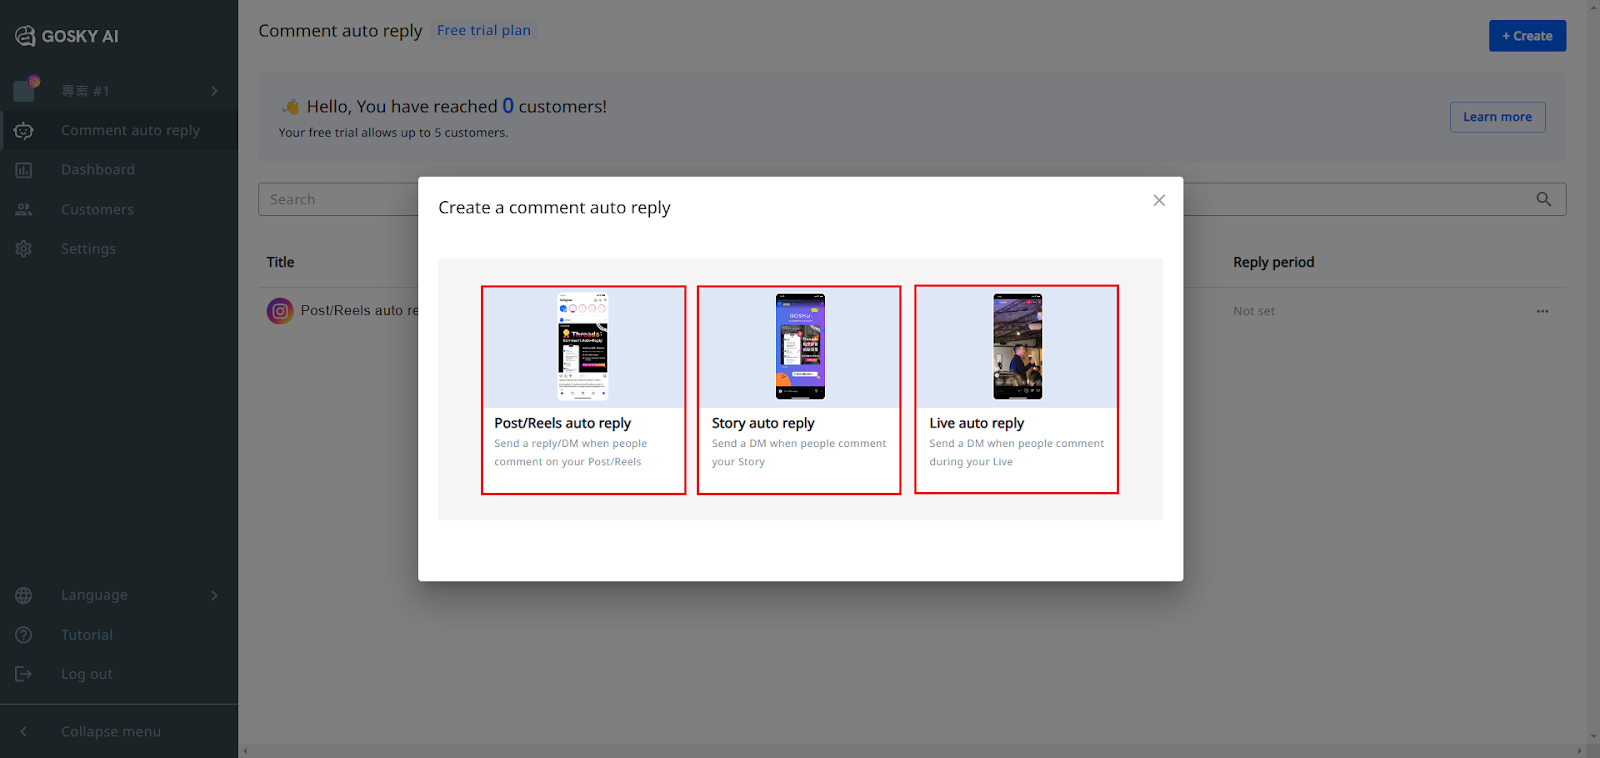
Step 2: How to Start Setting Up Comment Auto-Reply to DM
- Navigate to the Comment Auto-Reply to DM Feature
- Click “Create” in the top right corner of the Comment Auto-Reply to DM feature page.
- Click “Create” in the top right corner of the Comment Auto-Reply to DM feature page.
- Choose Your Auto-Reply Type
- Post/Reels Comment Auto-Reply to DM: Automatically replies to comments on Instagram Posts or Reels and sends a private message to the commenter.
- Story Comment Auto-Reply to DM: Sends a private message when a user comments on an Instagram Story.
- Live Comment Auto-Reply to DM: Sends a private message when a user comments during a Live broadcast.
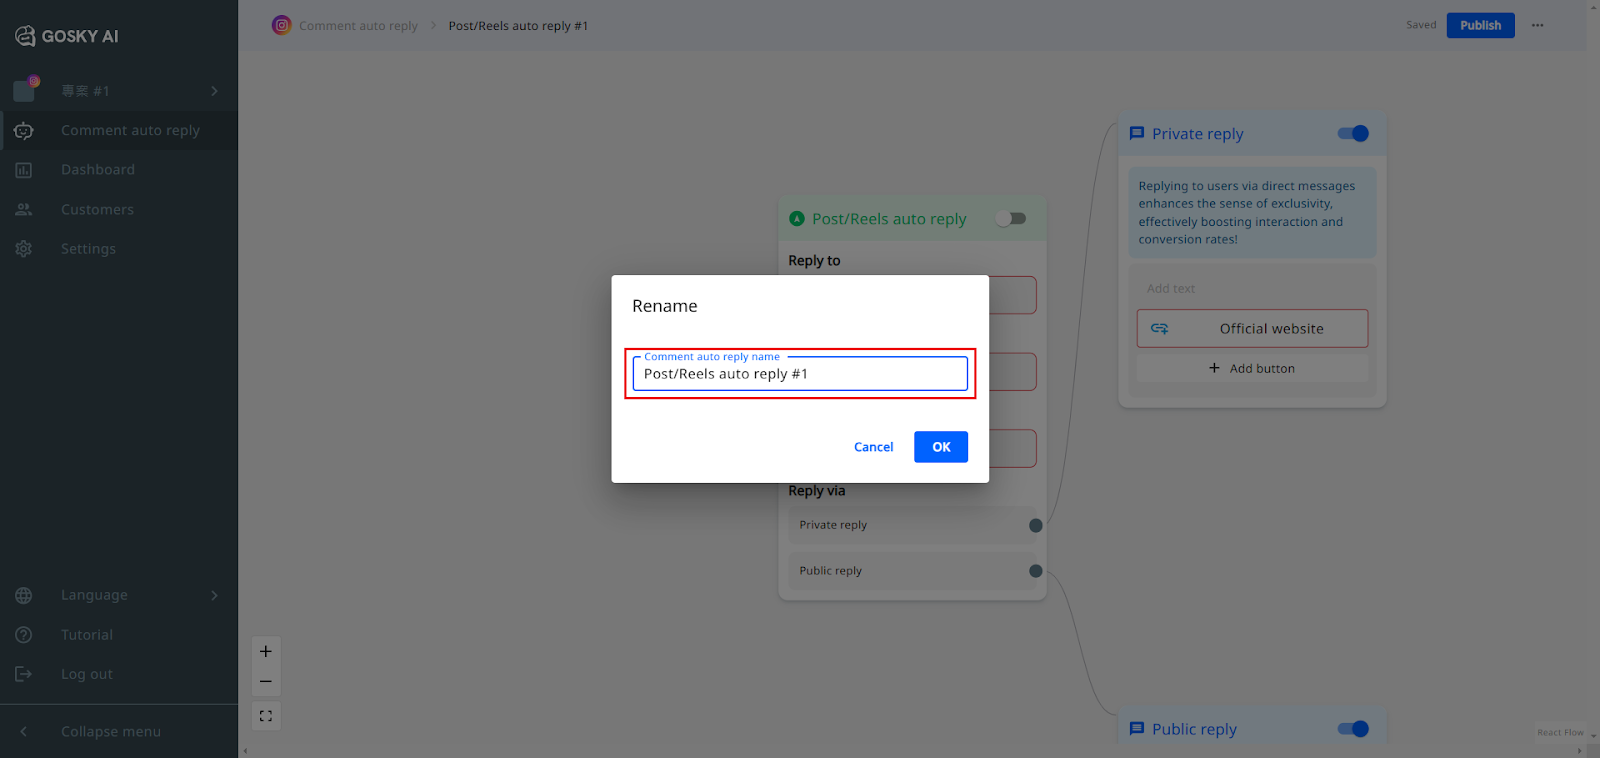
- Rename your title
- Once you select a type, you can begin setting up your title name
- Once you select a type, you can begin setting up your title name
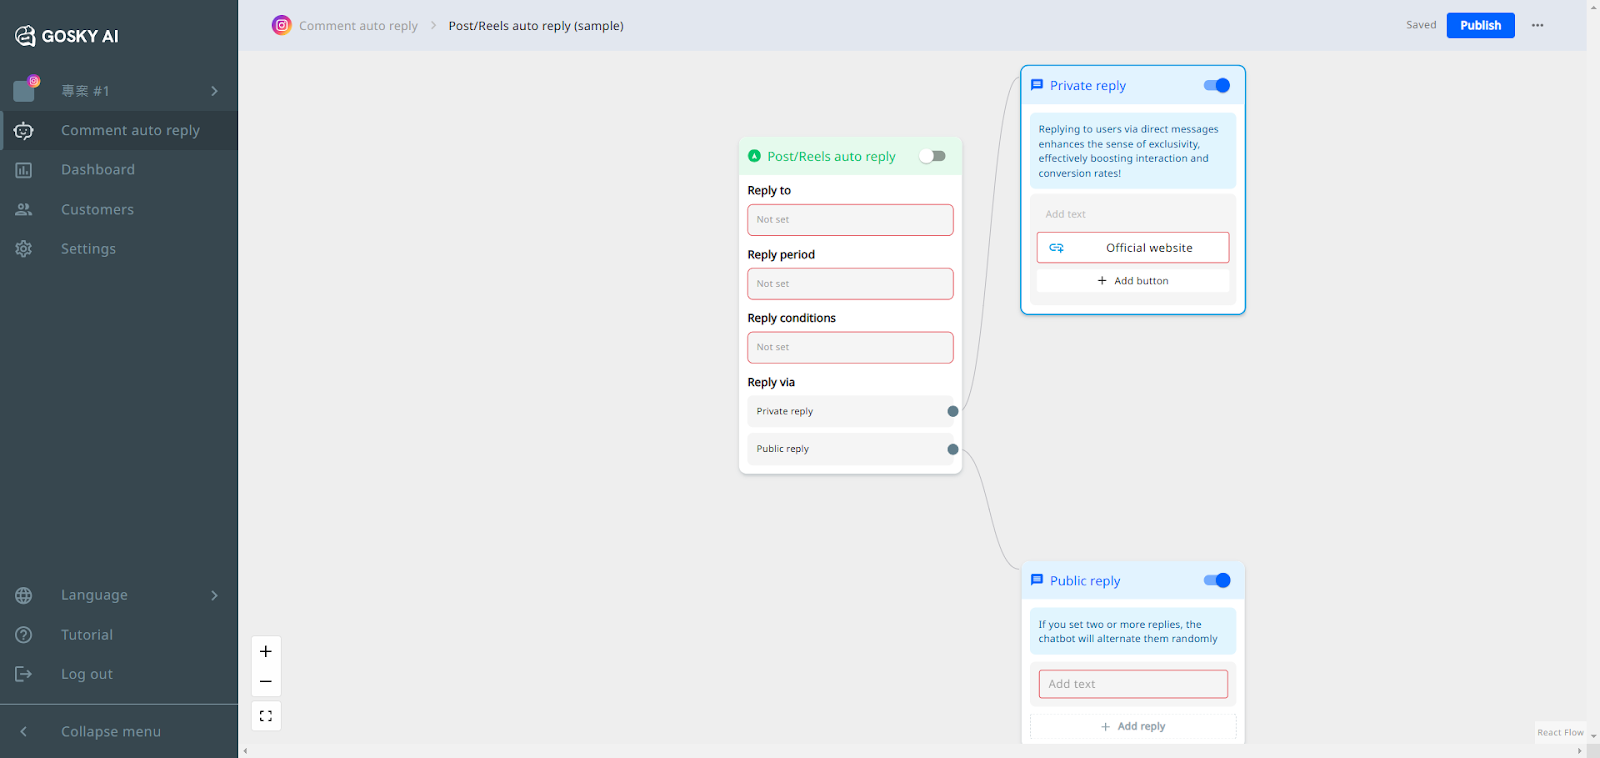
Step 3: How to Set Up and Edit Auto-Reply Content
Once the Comment Auto-Reply to DM is created, you can fill in the information you would like to provide.
Example Use Case
If you want to:
✔️ Increase engagement by encouraging comments to boost reach.
✔️ Send a private message with a survey link to collect feedback and generate leads.
✔️ Combine a public reply asking them to check their DM while providing relevant information, freebies, other valuable resources, etc.
Steps to Set Up Auto-Reply
1️⃣ Prepare a Published Instagram Post
Due to Instagram's API restrictions, you must have at least one publicly published post before enabling Comment Auto-Reply to DM.
2️⃣ Select the Content to Enable Auto-Reply
- All Posts/Reels: Auto-replies trigger on every post.
- Specific Post/Reels: Auto-replies only trigger for selected content.
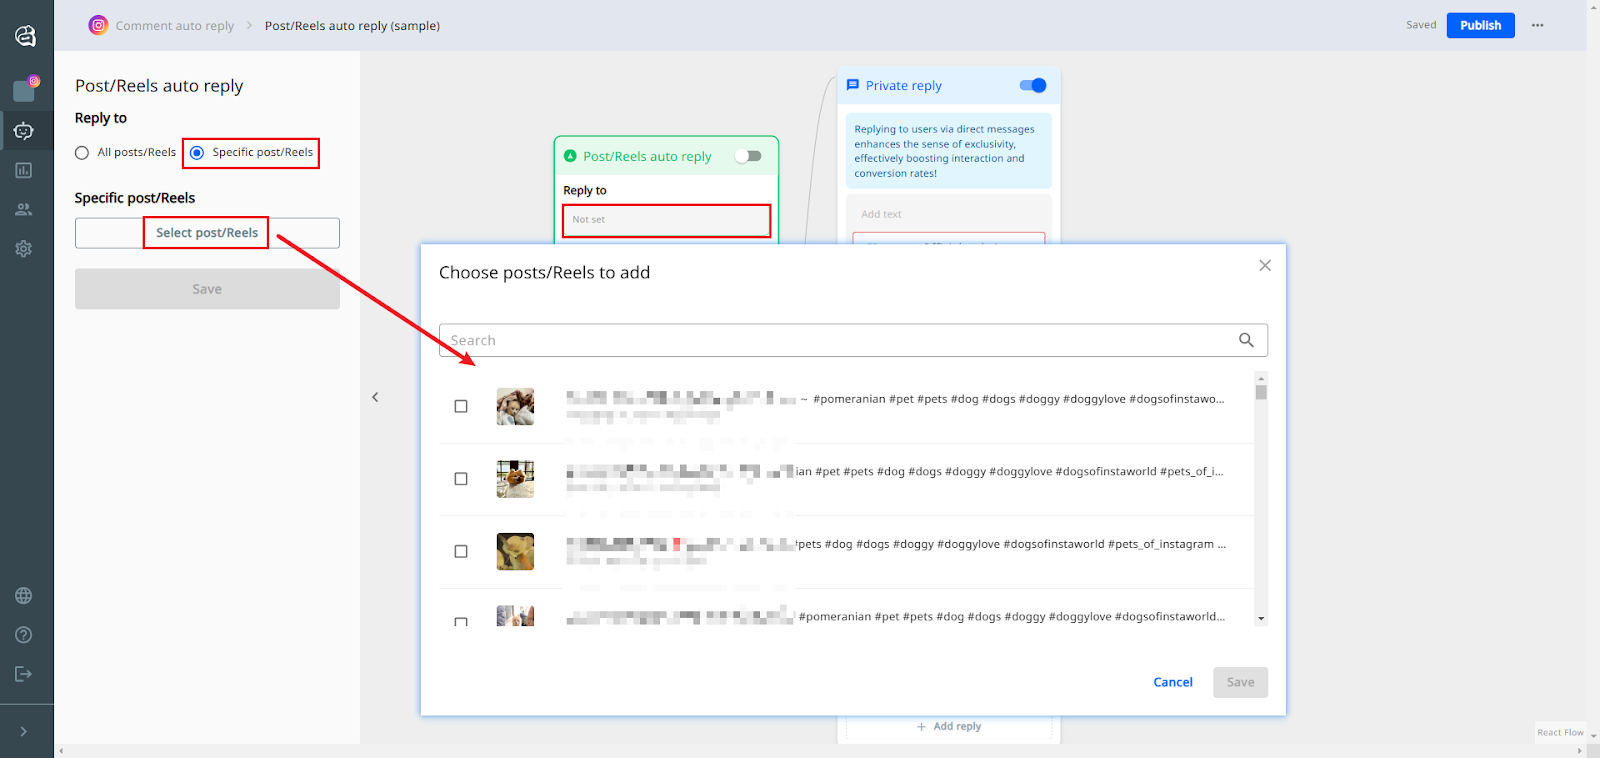
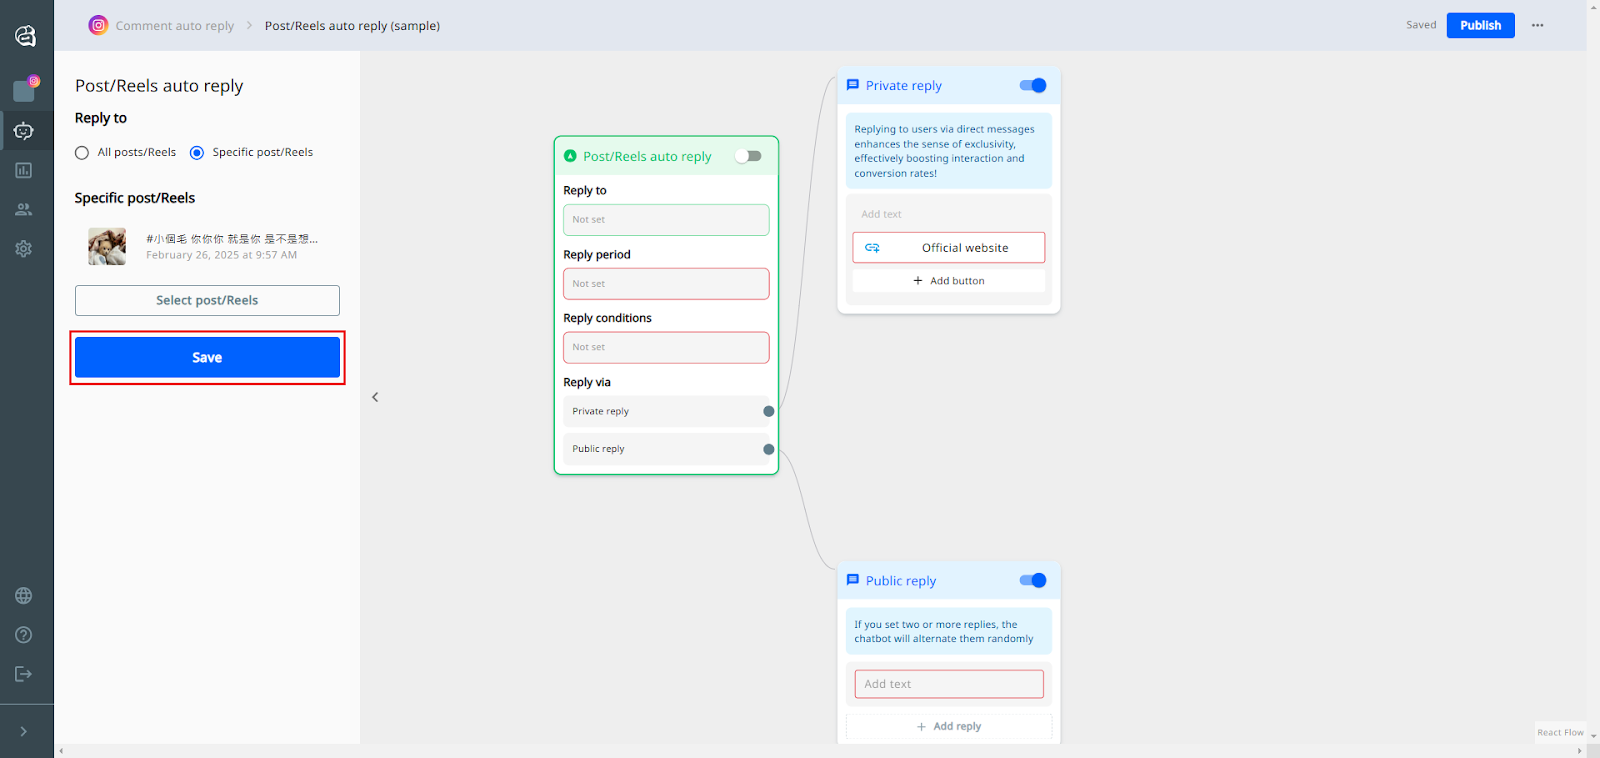
Once you complete selecting, click save.
3️⃣ Set the Reply Timing
- Always On: Auto-replies work indefinitely.
- Limited Time: Define a specific start and end period.
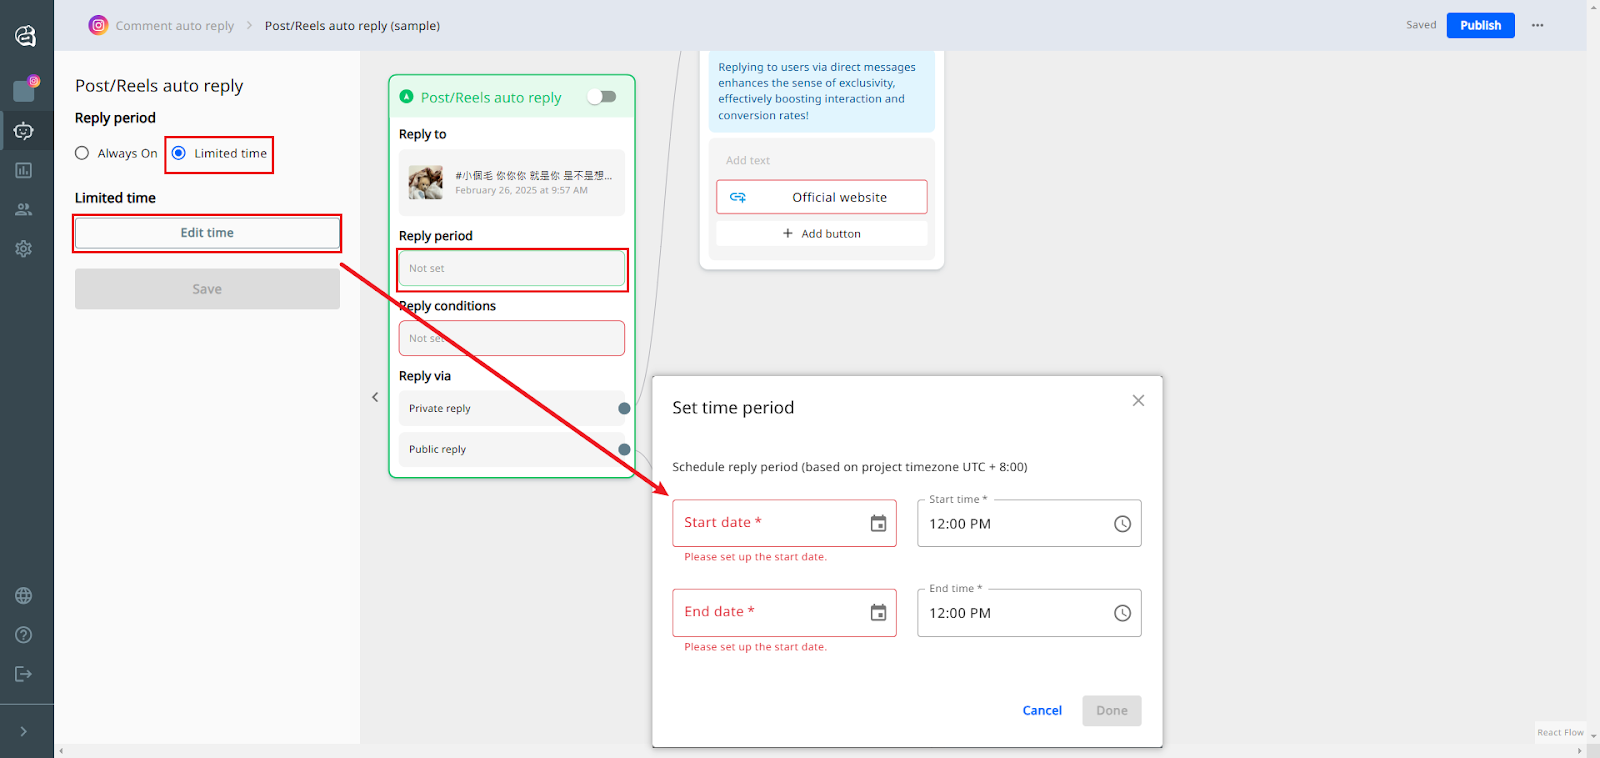
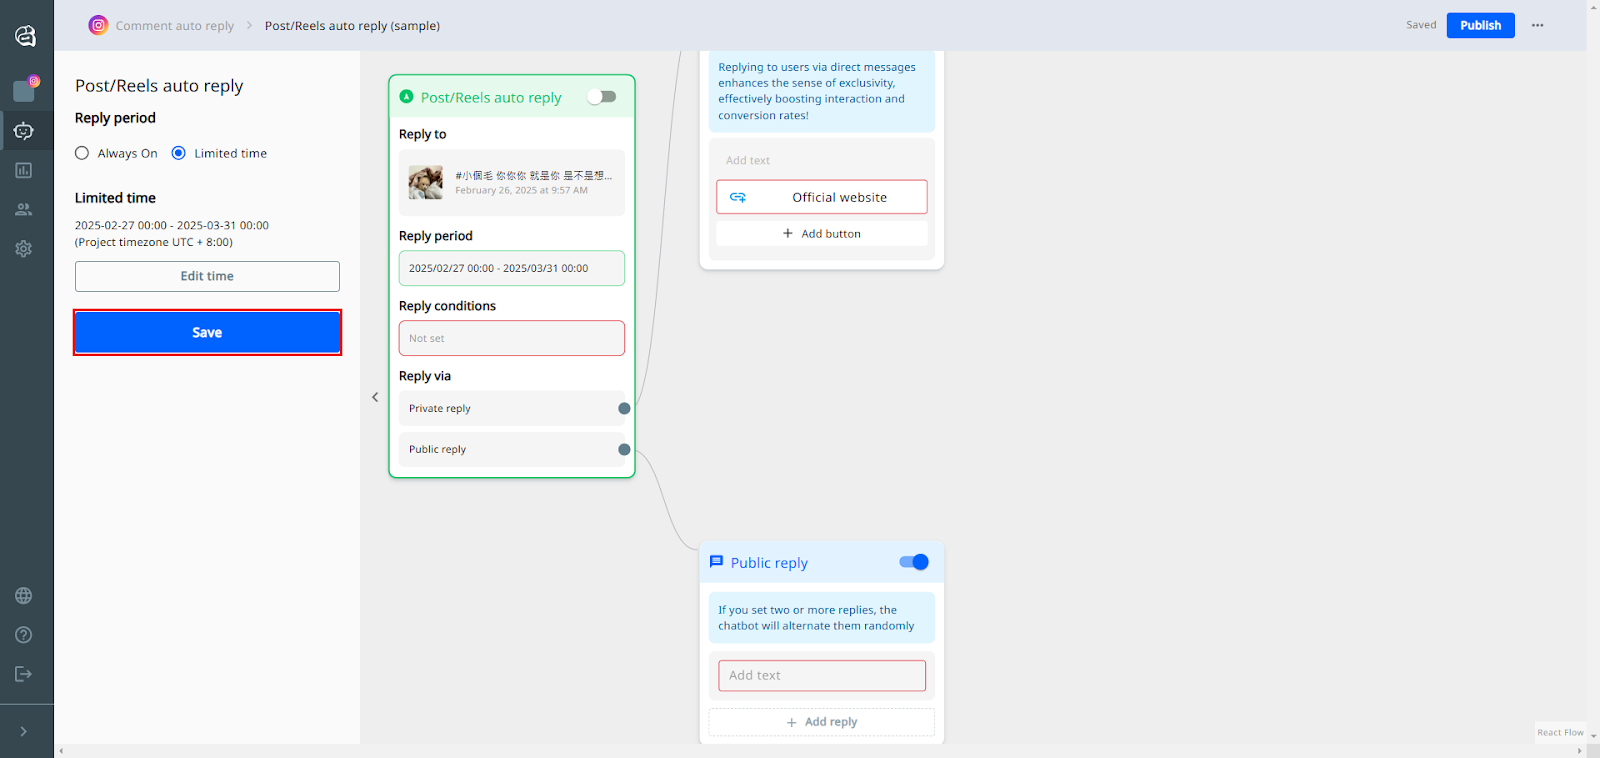
Once you complete settings, click save.
4️⃣ Define Auto-Reply Conditions
- All Comments: Auto-replies trigger regardless of content.
- Specific Comments: Replies trigger only if a comment contains certain keywords.
- Type the key word you would like to have
- Press “Enter” to turn the word into BLUE
- You can also add different key words at this column

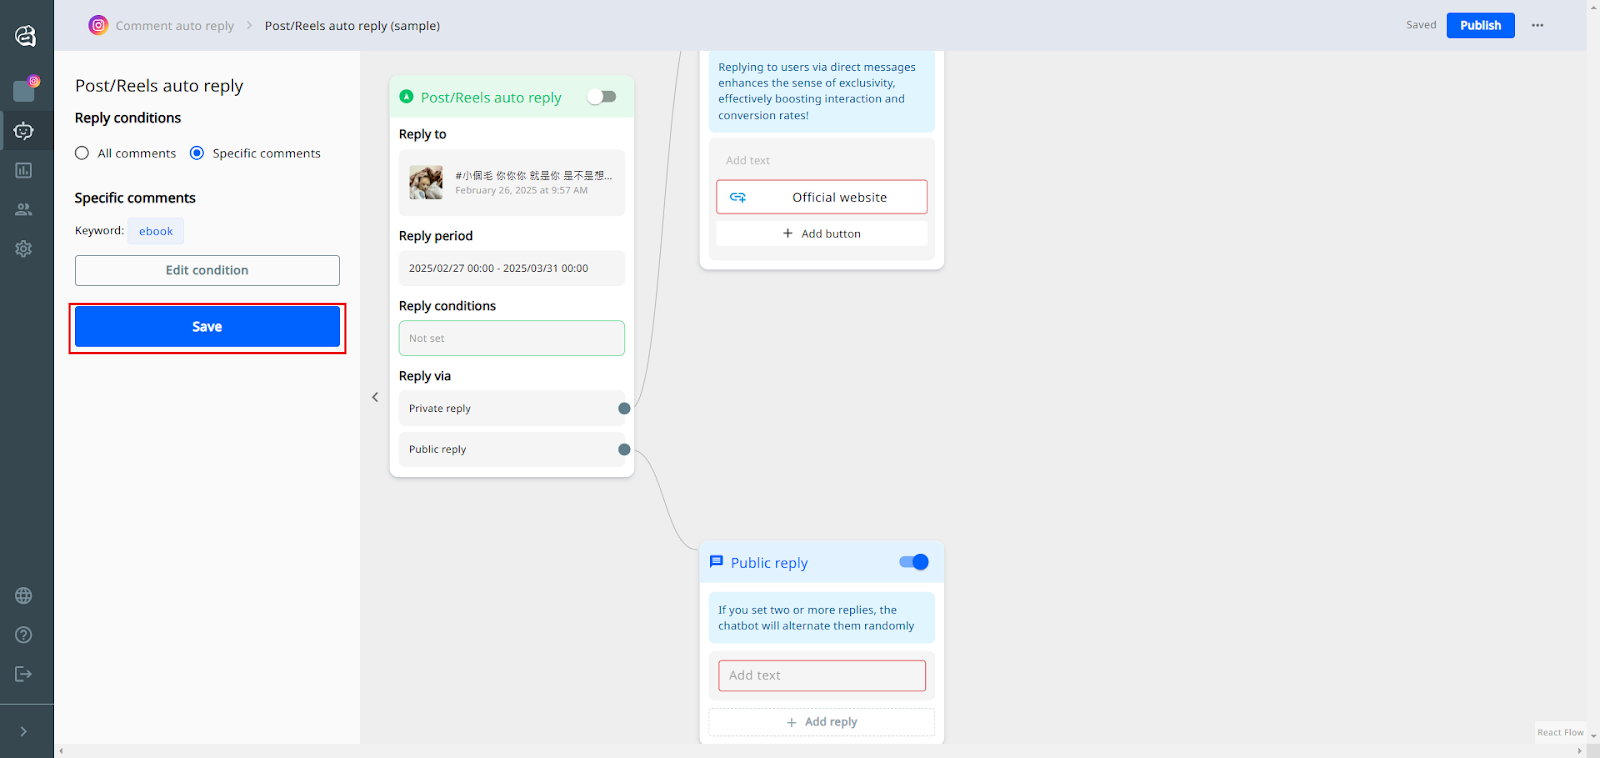
Once you complete settings, click save.
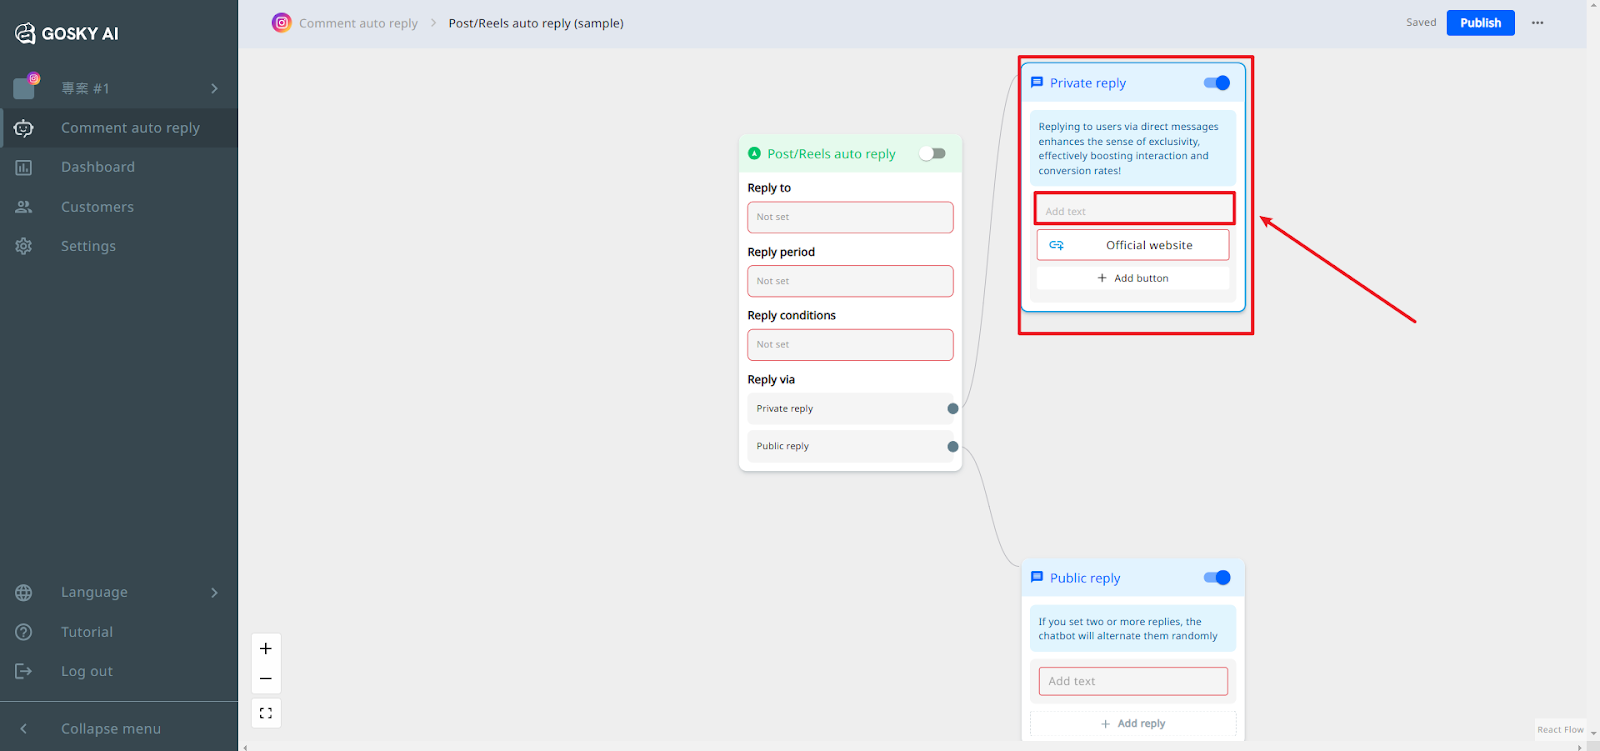
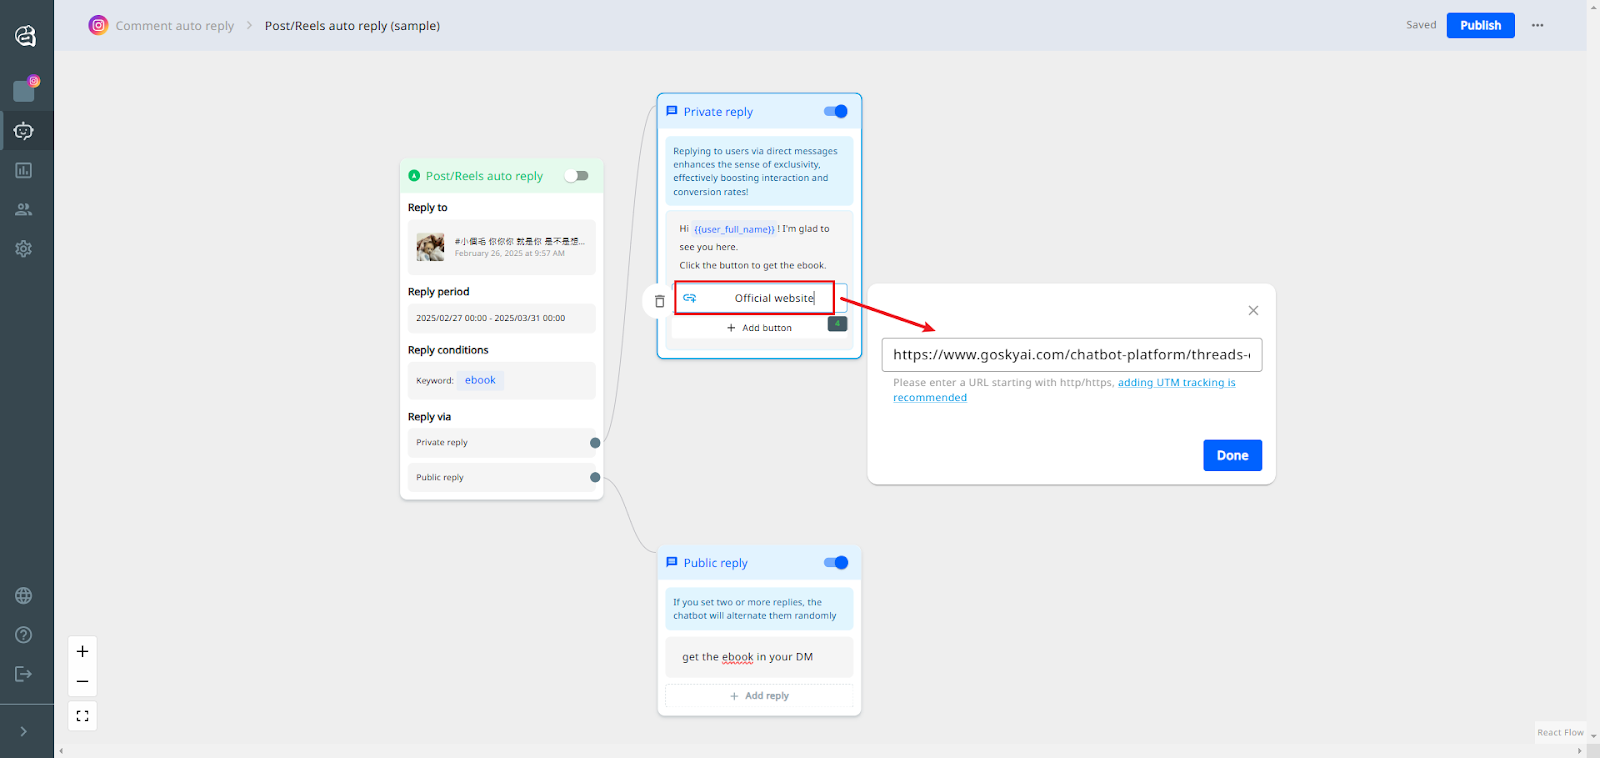
Step 4: Setting Up Private Replies
After setting up the Post/Reels conditions, you can set a private message to the commenter.
How to Set Up Private Reply
- Click “Add Text” to input the direct message (DM) you want to send.
- Add a CTA button (e.g., Official website,Start the Survey) and insert the destination link.
- Click Done to complete the URL setup.
📩Example Private Reply Message:
"Thank you for joining our pre-launch event! Complete this survey to get an early bird purchase link."
Note: You can Click “+ Add Button” to add different buttons.
Step 5: Setting Up Public Replies
Unlike private replies, public replies appear directly under user comments, increasing visibility and engagement.
How to Set Up Public Reply
- Go to the Public Reply editing section.
- Click “Add Text” to input the public comment.
- Then complete!

Example Public Reply:
💬 "Thanks for your comment! Check your DMs for an exclusive link!"
Note: You can Click “+ Add Reply” to create multiple randomized replies to avoid repetitive responses.
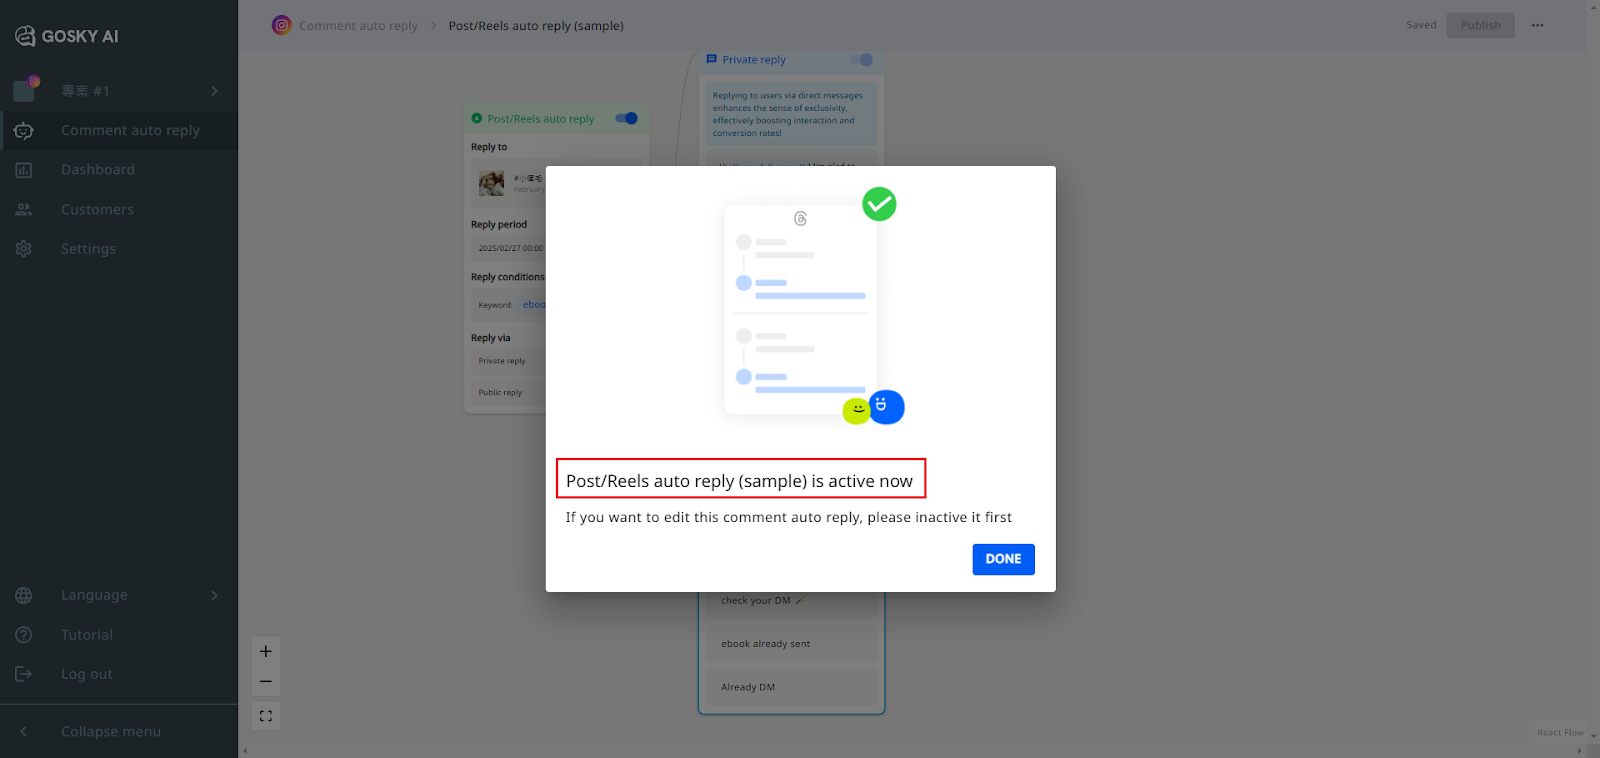
Step 6: Publish your comment auto reply
How to Set Up Public Reply
- Click publish at the upper right side or click the button at the right side of “Post/Reels auto reply block”.
- Then complete the setting for your comment auto reply!
Congratulations🎉